
Benefits of Optimizing your Imagery
- Faster server upload times – For hosted tours, you need to upload to a storage/hosting service somewhere. The smaller the files that faster you can upload, and potentially make changes or tweaks quickly for your clients.
- Lower storage fees – Storage and upload/download fees are lower when you have smaller files. While the pricing is not that big of an impact it does add up as you add tours.
- Faster user experience – Smaller files means faster load times for your tours, and a better user experience for you clients.
Steps for Optimization
Optimizing your imagery includes choices between file type, image size, and optimization software.
File Type
Optimizing your imagery starts with the file type. Jpeg files are smaller than png files and easier to optimize. The 24-bit png file will be about double the size of an optimized jpg file. So whenever you do not need transparency, use jpg files. I do not recommend using 8-bit png files because they do not look good in my opinion compared to the png24 or the jpg alternative.
Image Size
Image size is the single biggest impact on file size. The 360 tour software programs will provide resizing for panos, but the other graphic assets are included at the size you add them to the tour. Items such as a logo, floor plan, map, info popup, images for photo galleries, should be no larger than the actual needed size. As photographers we want quality, but larger image sizes are not needed for most viewing. Reduce the size of your images before you add them to your tour.
Optimization Methods
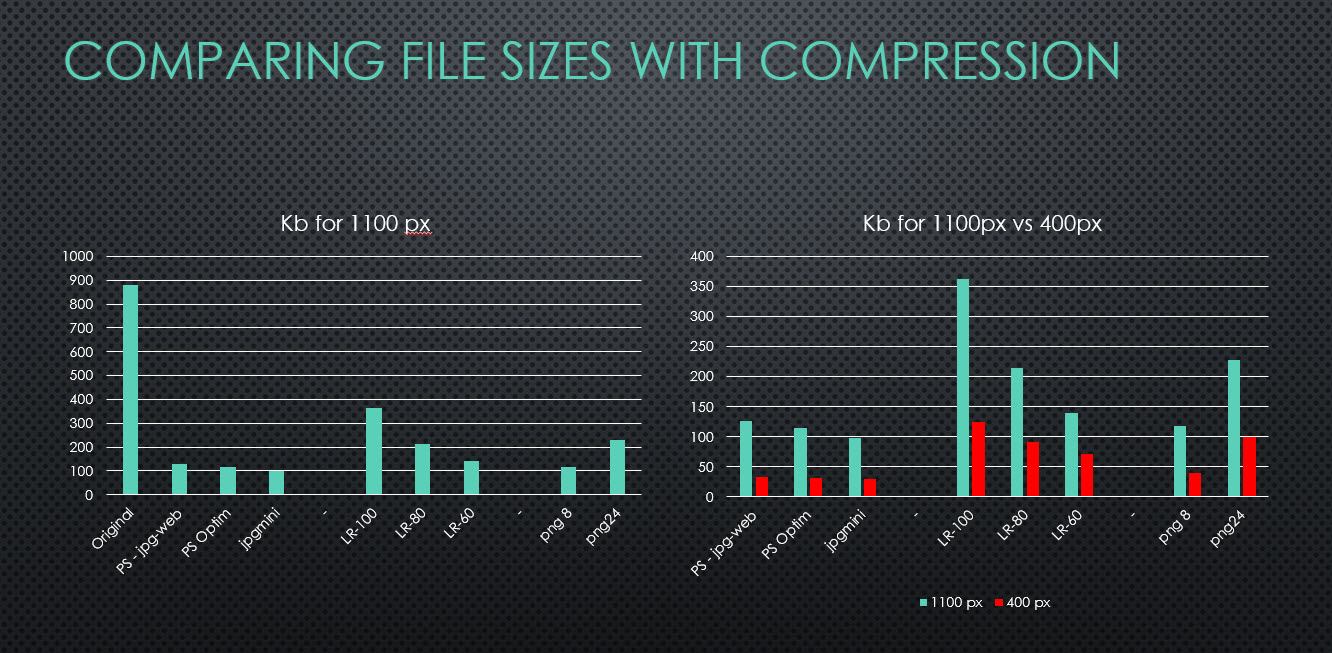
There are several ways to optimize your images. Your can use Lightroom or Photoshop reduce the quality of your images when you export them or you can use a number of other software programs to optimize them on your desktop like JPEGmini, or online like with TinyPng, EWWW, or Short Pixel. I have gone through comparisons with Lightroom, Photoshop, and JPEGmini, as well as comparing the online options. To optimize the images so Google recognizes then as fully optimized, you need to reduce the % quality to 60% in Lightroom or Photoshop. At that point the images do not look good. I also saw less than stellar results from EWWW. After trying various options, I use JPEGmini. I use the plugin for both Lightroom and Photoshop, and I use the desktop version for optimizing entire folders. I optimize my photos before I upload them to my website, and then use Short Pixel to pick the best size to be displayed.
The diagram below shows a comparison of various optimizations, file sizes, and file types.
My Workflow Test for 360 Tours
I wanted to see how big of a difference JPEGmini has on my 360 virtual tour size, and I looked at 3 different workflow scenarios:
- Tour without any optimizations: I exported my fully edited panos from Lightroom at 100% with no reduction in quality.
- Tour with JPEGmini optimization after tour publishing: After I published the tour, I dropped to total folder onto the JPEGmini desktop for in place optimization.
- Tour with panos optimized with JPEGmini before and after tour publishing: I used the JPEGmini plugin to optimize the pano files prior to adding them to the
So let me tell you a little about the tour. It is a moderate sized tour of 50 panos, with no video or music and only a couple of additional assets such as floor plans and maps. The tour was created with 3DVista 2020.3.8 64bit. I included the download feature in the tour which adds about 6% to the overall size of the final tour folder. For the panos, I use 12288px x 6144px files. I use a multiple of 1024 for my file sizing because it makes a difference in some software programs do their own resizing. I do not reduce the size of the images for my tour export.
| Scenario | Folder Size | Percent Reduction |
| No Image Optimization | 1.12 GB | 100% |
| After | 0.99 GB | 88% |
| Before and After | 0.95 GB | 85% |
Comparison of Imagery
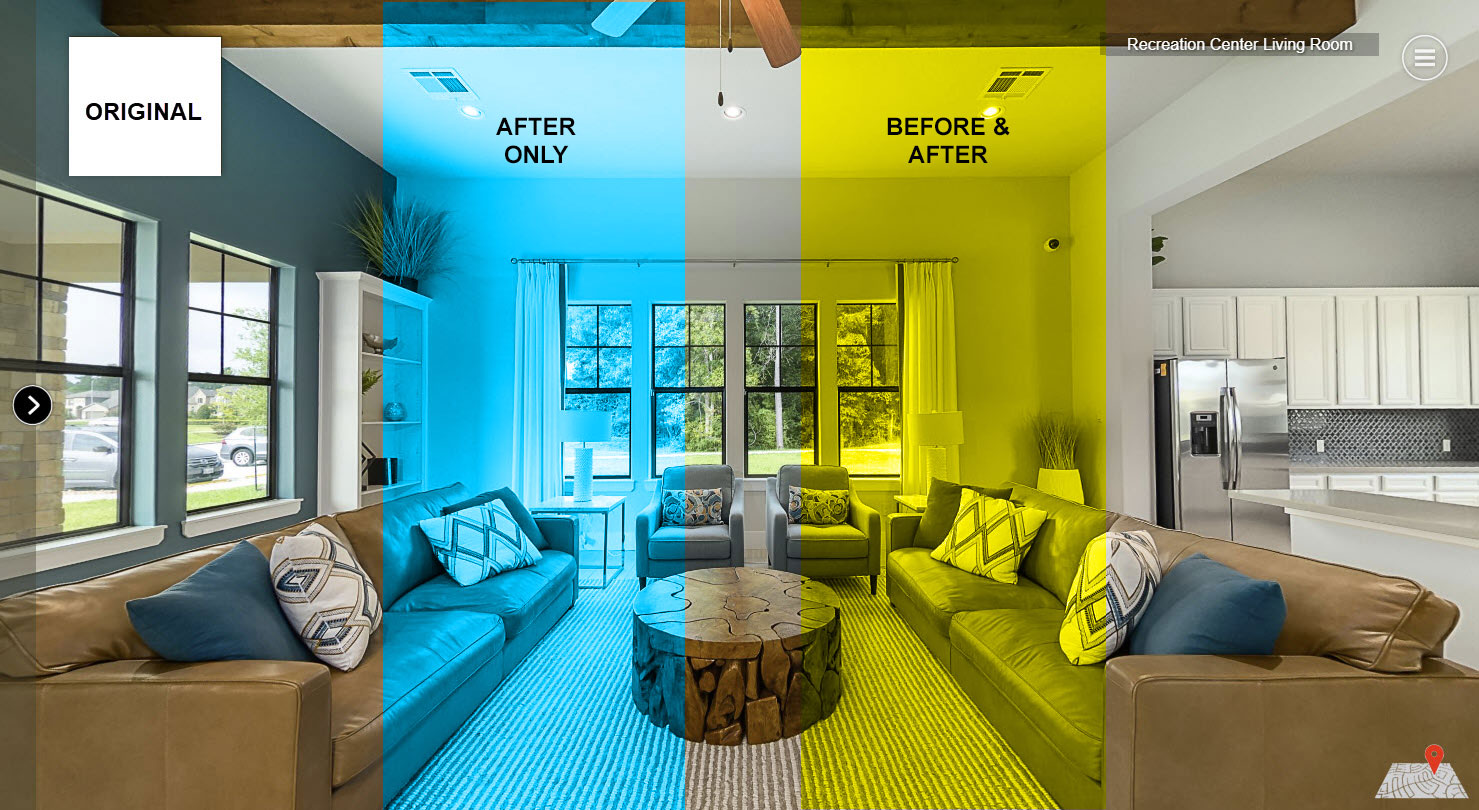
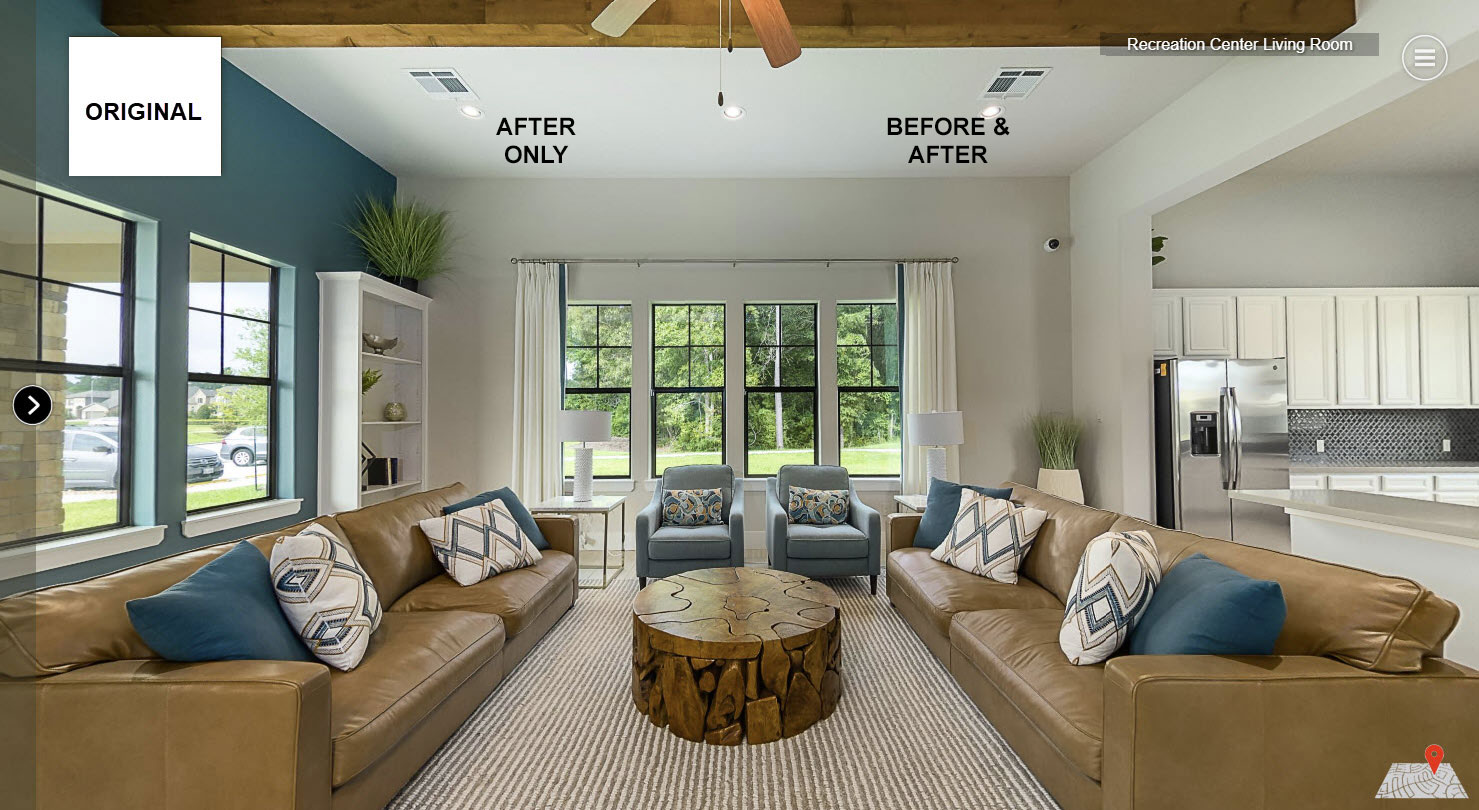
After I created each of the tours, I uploaded them to my website, and tested them in GTMetrix to compare load speed. There was no statistical difference between the load times, so I did not include that data here. I also took screen shots on a 24 inch screen of each of the options, and then compared them in Photoshop. I could not tell a difference between the original un-optimized and the other 2 scenarios. I have the combined image below that has sections of the three scenarios layered together. You cannot tell a difference between them. This is consistent with testing I have done in the past with JPEGmini on my website.
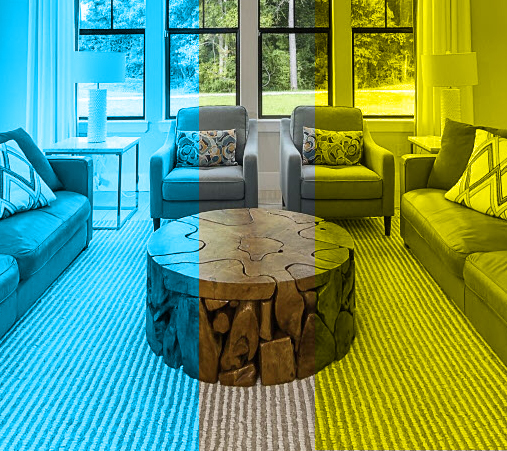
Cropped Version
Recommended Workflow
Based on the results above, I plan to just optimize after the tour is published. The additional 4% is not worth it for me with the extra step from Lightroom.
Video is another area which can really bloat your tour folder. I recommend hosting the video outside your tour for this reason.
How do you optimize your imagery for 360 tours?
I think this is a real great article. Really looking forward to read more. Keep writing. Vinnie Baxy Krefetz
Appreciate you sharing, great article. Thanks Again. Cool. Koren Luther Mora
Interesting, that’s a huge reduction in bandwidth… I hope 3D Vista is paying attention, that would be a big benefit to their users and actually also to 3D Vista’s hosting service (lower cost/tour = more adoption from users).
I would be worried that optimizing after the fact might cause some artifacts near the seams of the image pieces that would be obvious (since full panoramas are broken into smaller segments to optimize for different window sizes/devices), you haven’t found that to be the case?
I recently hosted a fairly large tour (~10,000 sqft home). My hosting cost for the first two months alone was $100 on Amazon S3. If I can drop bandwidth to 80-90%, this would be a game changer!
OK, I was so excited to give this a shot that I downloaded JPEG mini and ran the trial version (only allows 200 photos which is lots for a typical photographer but basically nothing for a virtual tour where one panorama generates ~500 files. Anyway, I also export from Lightroom at 100% with no size reduction, and then build the tour with those panoramas and then ran JPEG mini on two primary angles on the resulting files, since I couldn’t do a full panorama.
The result was only about a 10% reduction in size. Not nothing, but nowhere close to the 88% reduction here. I have no idea how you obtained that result, there are no setting I was able to find within JPEGmini that would make much of a difference.
Hello Dean,
I think there may be some confusion about how much reduction I saw. The file size was reduced by 15%, and was 85% of the original unoptimized file size. I think my wording created some confusion.
And no, I have not noticed any artifacts on the edges with optimizing after the tour is published.
The biggest impact on file size are the dimensions. What size are your images?
$100/ month for one tour seems really high. When I used S3, I never saw costs that high.
Ah yes, looking at the GB instead of percent reduction (I’d maybe use 15% instead of 85% to be more clear) would’ve clarified that. On my test, even though it was only a partial panorama, I also didn’t see a single artifact along stitch lines/between segments. So that’s good news. If I did enough tours, I suppose 15% reduction in bandwidth/storage would start to add up.
To your question, the tour on Amazon S3 was a roughly 1GB, 30,000 file project. Given that it was for a lottery home – one that was closed to the public during COVID – there were several thousand views in the first month and tapering. The ~ $100 was for the first two months (actually looking back it was only $80). The original photos are from a Z1: 7296×3648/approximately 20 MB each after Lightroom and Topaz DeNoise. And I didn’t realize this, but apparently 240 dpi (I’d have assumed 72 dpi).
Hi,
I have been using Jpegmini for a while now and find it great and a must have piece of software.
I also use 3D Vista for my tours and have recently been going through all my tours and reducing the jpg files.
Now my question is : When you save the tour (with Media) it creates a folder with the following folders within:
albums
floorplans
panoramas
videos
Some of these folders were created before i used Jpegmini.
just wondering if it would possibly cause any issues if i were to drag these into Jpegmini.
Particulary the panorama images.
I think it will be fine but would like your thoughts.
This would be good before I archive them.
Many thanks
Simon
After I create the tour output, I drag the folders into jpegmini before I upload it to my website. I have not seen any issues.